Install Free Standing Tub Faucet
This article will discuss how to install a freestanding tub faucet. This detailed guide is crucial for homeowners wishing to install a standalone tub faucet and give their bathrooms a touch of elegance. Adding a tub spout to a freestanding tub faucet can enhance the overall functionality and appearance of the fixture.
The step-by-step instructions provided in this post will make the installation process easy and efficient, ensuring a smooth and hassle-free experience. Let’s dive in!
What is a Freestanding Bathtub Faucet?
A freestanding tub faucet also known as a floor mounted tub faucet, tub filler or a bathtub faucet is a distinctive and stylish bathroom fixture explicitly designed for use with freestanding bathtubs.
This type of faucet is floor mounted directly onto the floor beside the tub rather than being attached to the wall or the tub itself.
This design adds an elegant and modern touch to your bathroom, setting it apart from traditional wall-mounted or deck-mounted faucets.
A freestanding bathtub faucet often come with a hand shower and a shower head, making them versatile and functional.
Freestanding tub faucets are available in various designs, materials, and finishes, allowing you to choose the perfect complement to your bathroom’s decor.
These free standing tub faucets add visual appeal to your space and offer practical benefits.
Many freestanding tub faucets have a hand shower, providing added versatility and functionality. The hand shower allows for easy rinsing and bathing, making your overall bathing experience more comfortable and enjoyable.
In addition to the freestanding tub filler aesthetic and functional benefits, freestanding bathtub faucet is often designed with solid construction and quality materials, ensuring long-lasting durability.
When choosing a freestanding tub faucet, consider factors such as the height and spout reach to ensure the tub filler is compatible with your tub and provides adequate water coverage.
A freestanding tub faucet is an excellent option for upgrading their bathroom with a stylish and functional fixture. The unique design and added convenience of a hand shower make these free standing tub faucets popular for homeowners looking to enhance their bathing experience.
Tools You Need
Before proceeding with the installation process of the freestanding tub filler, let’s discuss the essential tools you need. These tools will make your installation process efficient and hassle-free. Here’s a list of the tools you will need:
- Adjustable Wrench: For tightening and loosening nuts and bolts during the installation.
- Screwdriver: To secure screws in place when assembling the freestanding bathtub faucet.
- Pipe Cutter: For cutting the pipes to the desired length.
- Teflon Tape: To seal the pipe connections and prevent leaks.
- Level: To ensure the freestanding tub faucet is perfectly aligned during installation.
- Measuring Tape: To measure the proper distance between the bathtub faucet and the bathtub.
- Plumber’s Putty: For creating a watertight seal around the base of the tub filler.
- Drill: A drill is a versatile power tool used for drilling holes in various materials, such as wood, metal, plastic, and masonry.
- Hole Saw: A hole saw is a circular, cylindrical-shaped cutting tool used for cutting large-diameter holes in various materials, such as wood, metal, plastic, and drywall. The hole saw consists of a central drill bit, often called the pilot bit, and an outer cutting blade with a toothed or serrated edge.
Step-by-Step Method on Installing the Freestanding Tub Faucets
Installing a freestanding tub faucet may seem daunting, but you can confidently complete the task with the right guidance and tools.
Below are the steps to follow for a successful installation of free standing tub filler:
Step #1: Prepare the Bracket
First, determine the ideal location for your freestanding tub faucet, considering factors such as water flow, access to hot and cold water lines, and the tub spout’s reach.
It’s essential to place the tub filler at a comfortable distance from the tub, ensuring easy access and optimal functionality. Also, ensure enough clearance around the freestanding tub faucet for proper cleaning and maintenance.
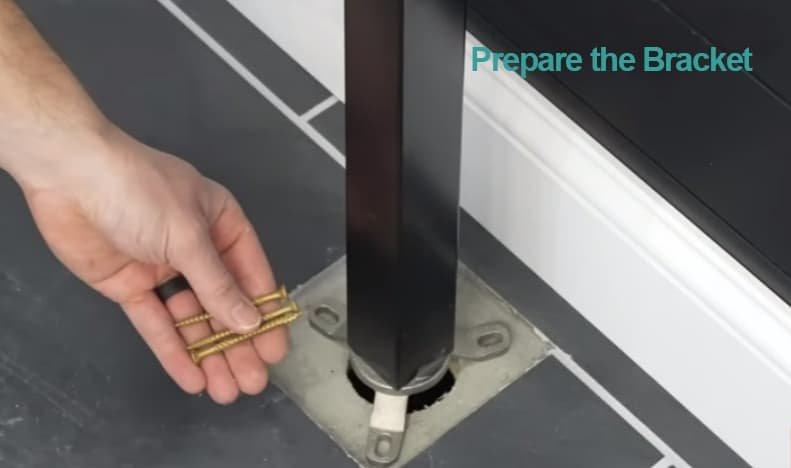
Once you’ve chosen the location, use a measuring tape to mark the precise position of the bracket on the floor. It’s crucial to double-check your measurements to avoid any misalignment during installation.
Place the bracket on the marked spot and use a level to ensure it is straight and aligned correctly. If your bathroom floor is a concrete slab or has a concrete layer beneath the flooring, you may need to drill pilot holes for the screws or anchors to hold the bracket in place.
Next, prepare the area around the bracket by cleaning it thoroughly to remove any dirt, debris, or residue. This step is crucial as it ensures a secure and lasting connection between the bracket and the floor.
Additionally, gather any necessary hardware, such as screws, anchors, or mounting plates, as specified by the manufacturer’s installation instructions.
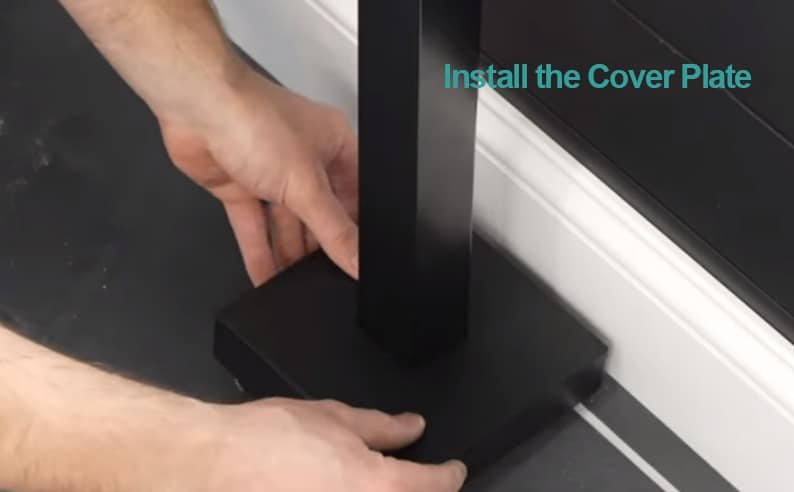
Step #2: Install the Cover Plate
After preparing the bracket, it’s time to secure it to the floor. First, drill holes into the floor using a hole saw, ensuring they align with the holes in the bracket.
Once the holes are drilled, clean out any debris from the holes to ensure a snug fit for the anchors or screws. Depending on the type of floor and the specific installation requirements, you may need to insert anchors into the holes to provide a secure base for the screws. Carefully insert the bracket into the holes, aligning it with the marks you made earlier.
Be cautious when drilling to avoid damaging any underlying pipes or electrical wiring. If you’re working on a concrete floor, using a masonry bit and hammer drill for this task is essential.
Next, secure the bracket to the floor using the appropriate screws or bolts, tightening them firmly with a screwdriver or wrench. Ensure the bracket is stable and secure, as it will support the entire weight of the freestanding tub faucet.
With the bracket in place, it’s time to install the cover plate. The cover plate serves both functional and aesthetic purposes, concealing the holes and screws while providing a polished and finished appearance.
Position the cover plate over the bracket, ensuring it covers the holes and screws completely. Depending on the design of your freestanding tub faucet, the cover plate may need to be secured with additional screws or may simply snap into place.
By correctly installing the cover plate, you create a solid foundation for the freestanding tub faucet while maintaining a sleek and seamless look in your bathroom.
Step #3: Connect the Pipeline
With the cover plate securely in place, the next step is to connect the water lines to the main tub faucet. This process involves attaching both hot and cold water supply lines, ensuring proper water flow and temperature control.
Before connecting the hot and cold water lines, turn off the water supply to your bathroom to prevent any accidents or water damage. Locate the shutoff valves for the hot and cold water lines and turn them off.
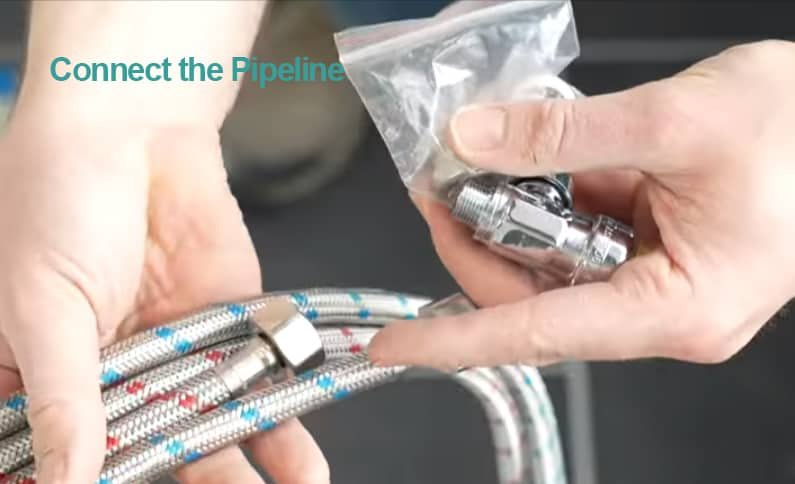
Now, apply the plumber’s tape to the threaded ends of the supply lines. This tape helps create a watertight seal and prevents leaks at the connection points. It’s essential to wrap the tape in the same direction as the threads to ensure a secure fit when attaching the lines to the tub faucet.
With the plumber’s tape in place, carefully connect the hot and cold water lines to the corresponding valves on the faucets.
Typically, the hot water valve is located on the left, while the cold water valve is on the right. However, always refer to the manufacturer’s instructions to confirm the correct valve placement for your specific faucets model.
Using an adjustable wrench, tighten each connection firmly but avoid overtightening, as this can damage the threads or cause leaks. Once both water lines are securely connected, inspect the connections to ensure no visible gaps or misalignments.
Properly connecting the pipeline ensures a reliable and efficient water supply for your freestanding tub faucet. This step is crucial for the overall functionality of the faucet and contributes to a satisfying and enjoyable bathing experience.
Step #4: Put Everything Together
With the water lines connected, it’s time to assemble the freestanding tub faucet also known as floor mount tub filler according to the manufacturer’s installation instructions.
This step involves attaching the various components, such as the tub spout, handheld shower sprayer, and any additional accessories that come with your faucet.
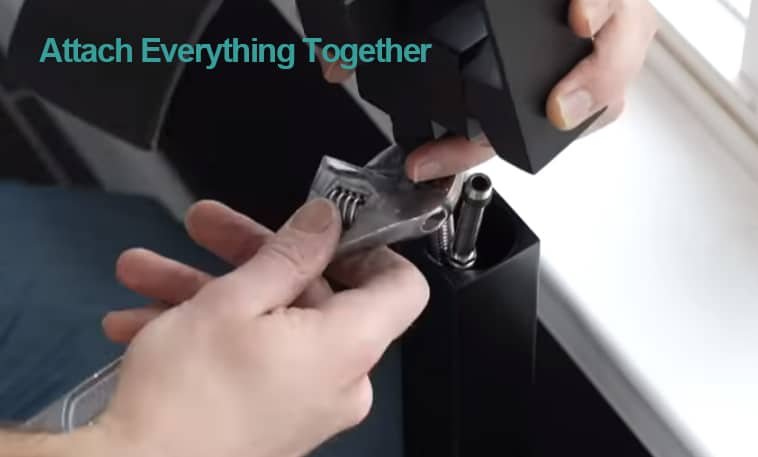
Begin by attaching the tub spout to the main faucet body. Depending on the design, this may involve screwing the spout into place or using a set screw to secure it.
Ensure the bathtub faucet spout is aligned correctly and tightly secured to prevent water leakage or misalignment.
Next, connect the handheld shower sprayer to the faucet. This typically involves attaching the hose to the designated outlet on the faucet body and then connecting the handheld shower to the other end of the hose. Ensure the connections are tight and the hose is free of kinks to ensure optimal water flow and functionality.
If your freestanding tub faucet includes additional accessories, such as a diverter or decorative trim, follow the manufacturer’s instructions to install these components correctly. Depending on the bathtub faucet design, this may involve attaching the accessories to the main faucet body or mounting them separately on the floor or wall.
Once all the components are in place, double-check the fittings to ensure they are secure and properly positioned. Confirm that the tub spout, hand shower, and accessories are aligned correctly and firmly attached.
By carefully assembling the freestanding tub faucet and its components, you create a cohesive and functional fixture that enhances your bathroom’s overall appearance and usability. Proper installation at this stage ensures a long-lasting and reliable faucet that delivers an enjoyable bathing experience.
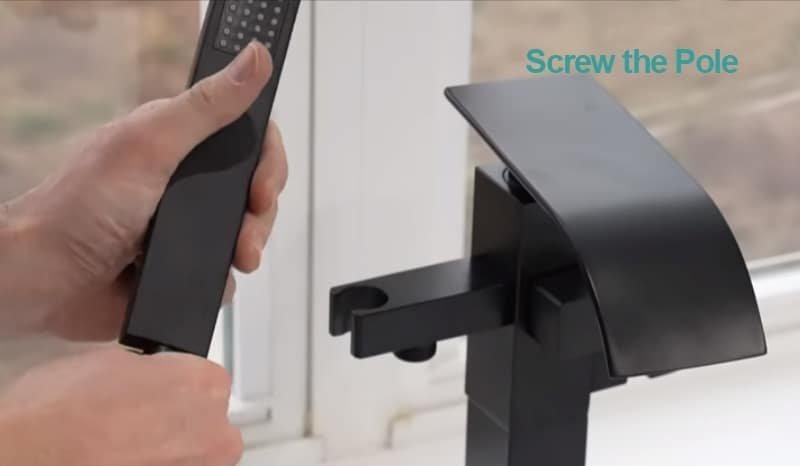
Step #5: Screw the Pole
With all the components assembled, it’s time to secure the pole of the freestanding faucet to the bracket on the concrete floor. This step is crucial for providing stability and support to the faucet, ensuring it remains firmly in place during use.
Carefully insert the pole of the freestanding faucet into the bracket, ensuring it is properly aligned and fully seated. Depending on the design of your faucet, the pole may slide into the bracket or require a specific mechanism for attaching it.
Always refer to the manufacturer’s installation instructions to determine the correct method for your particular faucet model.
Once the pole is in place, use a screwdriver to tighten the screws that hold the pole securely within the bracket. Ensure the screws are tightened evenly to prevent the faucet from leaning or becoming unstable. It’s important not to overtighten the screws, as this can damage the pole or bracket and compromise the faucet’s stability.
As you secure the pole, check the faucet for stability and alignment, ensuring it stands straight and does not wobble. A stable and secure pole is essential for your freestanding tub faucet’s proper functioning and longevity.
Step #6: Test the Faucet
Finally, turn on the water supply and test the newly installed freestanding tub faucet. Check for leaks and ensure the water flow and temperature function correctly. If everything is working as it should, your installation is complete!
Conclusion
Simple installation of a freestanding tub faucet can drastically improve the appearance and functionality of your bathroom. You can install a standalone tub filler in your home with the correct equipment, high-quality supplies, and these detailed instructions. This addition will enhance the aesthetics of your bathroom and offer an opulent and comfortable bathing experience.
Remember, following the installation instructions for free standing tub faucets provided by the faucet’s manufacturer is essential, and consult professionals if you encounter any difficulties during the process.
With a bit of patience and know-how, you’ll have a beautiful and functional freestanding tub faucet that will be a great addition to your bathroom.
For more information on freestanding tub faucets and other home improvement topics, visit faucetu.com.
Their resources and expert advice for freestanding bathtub faucet will help you make informed decisions about selecting and installing bathroom fixtures.
Your newly installed freestanding tub faucet will undoubtedly become a favorite feature in your bathroom, offering both elegance and practicality for years to come.